
Printing candle labels at home can look professional when the paper, printer, and settings work together. You do not need commercial equipment to produce clean labels for small batches, seasonal launches, or product testing. The key is to choose label material that matches your printer, print at the correct scale, and prepare the jar so the adhesive can hold.
This guide explains how to print candle labels at home using a regular inkjet or laser printer. You will learn which paper works best, which settings improve color and sharpness, how to avoid alignment problems, and how to apply labels without bubbles or lifting edges.
Quick answer: For most home-based candle businesses, start with matte white inkjet label sheets, set the printer to the closest matching paper type, select High or Best quality, turn off draft mode, and print at 100% or Actual Size. Test one sheet before printing a full batch.
What You Need to Print Candle Labels at Home
A simple home setup can handle professional-looking candle labels. Gather these items before you begin:
- An inkjet or laser printer
- Label sheets made specifically for your printer type
- A finished label design in PDF or high-resolution PNG format
- A ruler or flexible measuring tape
- A paper trimmer, scissors, or cutting machine if using full-sheet paper
- Isopropyl alcohol and a lint-free cloth for cleaning the jars
- One empty jar for test fitting before labeling the full batch
If you still need a printer, compare the options in our guide to the best printers for candle labels. It covers budget home printers, wide-format designs, compact roll printers, and higher-volume production. For full-color logo stickers and packaging seals alongside your candle labels, compare our sticker printers for small businesses. For barcodes, shipping labels, and everyday business labeling, also compare our best label makers for small business.
Choose the Right Candle Label Paper
The best paper depends on the look you want, the jar surface, and how the candle will be handled. Always check that the package says inkjet, laser, or compatible with both. Inkjet-only coating can be damaged by the heat inside a laser printer, while laser-only stock may not absorb inkjet ink correctly.
| Label material | Best for | What to know |
|---|---|---|
| Matte white paper | Beginner-friendly labels and soft, modern branding | Easy to print and write on, but less resistant to oil and moisture |
| Glossy white paper | Bright colors and product-photo style graphics | Use the correct glossy media setting and allow ink to dry fully |
| Printable vinyl or film | Durable labels that may face moisture or frequent handling | Choose a product made for your printer; some finishes need extra drying time |
| Clear film | A no-label look on smooth glass jars | Light ink colors may disappear on dark jars, and home printers do not print white ink |
| Kraft paper | Rustic, handmade, or natural branding | Colors print darker and less vividly than they do on white stock |
For a first test, matte white paper is usually the easiest choice. It hides small bubbles better than clear film and does not show fingerprints as easily as a high-gloss finish. If durability matters, test a printable vinyl made for your printer. Our printable sticker paper guide compares practical options for small-business packaging.
Inkjet vs. Laser: Which Printer Is Better?
Inkjet printers
Inkjet printers are a strong choice for colorful candle labels, gradients, photographs, and detailed branding. Many affordable home models produce attractive results on matte and glossy sheets. Inkjet ink can smear if the paper coating is incompatible or the label is handled before it dries, so use inkjet-rated material and follow the paper manufacturer’s drying guidance.
Laser printers
Laser printers use toner and are useful for crisp text, fast batch printing, and labels that need immediate handling. Color laser printers can be more expensive, and some thick or textured materials may not feed well. Use only laser-safe label stock and confirm that its thickness falls within the printer’s supported range.
What about thermal printers?
Direct thermal printers are excellent for shipping labels, barcodes, and simple black text, but most do not print full-color decorative candle labels. A thermal printer can still be useful for batch codes or small bottom labels, while an inkjet or color laser printer handles the main front label.
Measure the Candle Jar Before Designing
Measure the actual jar rather than relying on the supplier’s capacity description. Two jars sold as the same ounce size can have different outside dimensions.
- Measure the flat label area, avoiding strong curves, seams, and raised glass.
- Leave a small margin around the label so it does not sit against a curved shoulder or base.
- Print the label outline on plain paper at 100% scale.
- Cut it out and tape it temporarily to the jar.
- Check the proportions from the front, side, and at normal shelf distance.
Design the artwork at its final physical size. If you are creating the label yourself, our Canva for packaging design guide explains how to set custom dimensions and prepare simple packaging artwork.
Best Printer Settings for Candle Labels
Printer menus use different names, but the settings below are a reliable starting point. The best final combination depends on the exact printer and label stock, so save your successful settings after the first test. If you cannot find a setting, use the manufacturer’s driver menu; HP’s official print settings guide shows where paper size, paper type, color, and print quality controls are commonly located.
| Setting | Recommended starting point | Why it matters |
|---|---|---|
| Scale | 100% or Actual Size | Prevents the artwork from shifting away from precut label shapes |
| Paper size | Match the loaded sheet exactly, usually US Letter | A4 and US Letter use different dimensions and margins |
| Media type | Matte, presentation, glossy, or labels—the closest match available | Controls ink amount, speed, heat, and feed behavior |
| Print quality | High or Best | Improves small text, fine lines, and color coverage |
| Draft or economy mode | Off | Draft mode reduces ink or toner and can make branding look faded |
| Borderless printing | Off for most precut sheets | Borderless mode may enlarge the artwork and change alignment |
| Two-sided printing | Off | Labels should pass through the printer only once |
| Color management | Let either the app or printer manage color, not both | Avoids unexpected color shifts caused by double correction |
Important: US Letter paper is 8.5 × 11 inches, while A4 is 210 × 297 mm. Selecting the wrong size can move every label on the sheet even when the design looks correct on screen.
How to Print Candle Labels at Home Step by Step
1. Finish the design at the correct size
Keep essential text comfortably inside the cut edge. Use readable type sizes and strong contrast, especially for scent names, net weight, and any safety information. The National Candle Association’s candle safety guidance explains the role of fire-safety labeling and relevant ASTM standards. Export a print-ready PDF when possible because it usually preserves size and text more reliably than a screenshot.
2. Download the matching template
If you bought precut label sheets, use the template supplied for that exact product number. Templates from another brand may look similar but use different margins or spacing. Keep the sheet orientation consistent with the template.
3. Run a plain-paper alignment test
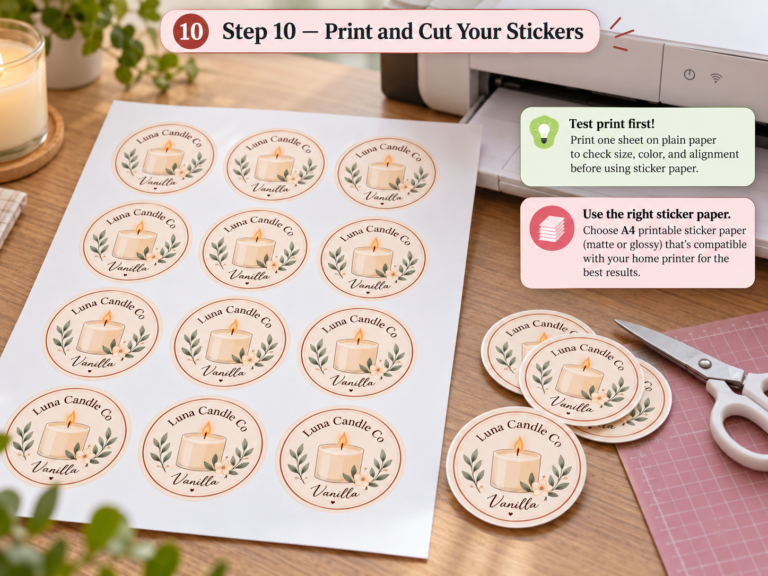
Print the layout on ordinary copy paper at 100% scale. Place the test page behind a label sheet and hold both against a bright window. Check whether the artwork sits inside each cut line. This inexpensive step can save an entire sheet of labels. Avery recommends the same 100% or Actual Size setting and plain-paper test in its home label printing guide.
4. Load one label sheet
Fan the sheets gently if the manufacturer allows it, then load only a small number at first. Confirm which side of the paper your printer uses. Keep unused sheets flat and dry so the corners do not curl.
5. Select the print settings
Choose the correct paper size, set the scale to 100% or Actual Size, select the closest media type, and use High or Best quality. Disable borderless, duplex, draft, and any automatic “fit” option unless the label supplier specifically instructs otherwise.
6. Print one sheet and let it rest
Inspect small text, solid color areas, and alignment. Inkjet prints may need time to dry before stacking, cutting, or applying. Do not rub the surface immediately after printing.
7. Cut and apply the labels
For full-sheet material, cut with a paper trimmer for straight rectangles or use a cutting machine for custom shapes. Clean the jar with isopropyl alcohol, allow it to dry completely, and avoid touching the cleaned area. Position one edge first, then smooth the label across the jar from the center outward.
How to Keep Labels from Peeling Off Candle Jars
- Clean the glass: Dust, fragrance oil, fingerprints, and wax residue weaken adhesion.
- Use a label sized for the flat area: Edges placed over a curve are more likely to lift.
- Apply at room temperature: Very cold jars and humid rooms can make application less reliable.
- Press the edges firmly: Smooth the entire label, then press around the perimeter.
- Test the finished candle: Observe a labeled sample during storage and normal use before producing a large batch.
A stronger adhesive is not always the only answer. If every edge lifts in the same place, the label may be too wide for the jar’s flat panel or too stiff for its curve.
Common Candle Label Printing Problems
The labels print off-center
Confirm the paper size and switch from Fit to 100% or Actual Size. Check that borderless printing is off. If the first row is correct but lower rows drift, the sheet may be slipping, curled, or loaded against the wrong guide.
Ink smears or never dries
Make sure the label is coated for inkjet printing and that you printed on the correct side. Select a compatible media type, reduce heavy ink coverage in the design if necessary, and allow more drying time before handling.
Colors look dull
Turn off draft mode, choose High or Best quality, and use white label stock for the brightest result. Kraft and clear materials change how colors appear. Remember that screens emit light, so printed colors naturally look different from the monitor.
The printer will not feed the sheet
Check the printer’s supported paper weight and thickness. Load fewer sheets, flatten curled stock, adjust the paper guides, and use the rear or specialty feed path if your printer provides one.
Small text looks fuzzy
Export the design as a print-ready PDF rather than a screenshot. Avoid extremely thin fonts, use high-resolution graphics, and print at High or Best quality. If black text contains several ink colors, try a simple solid black for sharper edges.
A Simple Test Before You Print a Full Batch
Print three to five labels and apply them to clean jars. Check them after 24 to 48 hours for lifting, bubbling, smearing, or color changes. Handle one jar with normal pressure and keep another in the same storage conditions as your finished candles. A small test is far cheaper than reprinting an entire launch.
Keep a short production note with the paper brand, product number, printer, media setting, quality setting, file type, and any alignment adjustment. This becomes your repeatable recipe for future batches.
Frequently Asked Questions
Can I print candle labels with a regular printer?
Yes. A regular inkjet or laser printer can produce professional candle labels for small batches when you use compatible label stock and the correct settings. Inkjet is often preferred for rich color, while laser is useful for crisp text and faster handling.
What paper is best for candle labels?
Matte white adhesive paper is the easiest starting point for most home businesses. Printable vinyl or film offers more resistance to moisture and handling, while clear and kraft materials create distinctive looks but require more testing.
Should I use glossy or matte labels for candles?
Choose matte for a soft, premium look with fewer fingerprints. Choose glossy for brighter colors and a polished retail finish. Adhesive strength, printer compatibility, and jar shape matter more than finish alone.
Why are my candle labels not lining up?
The most common causes are the wrong paper size, Fit to Page scaling, borderless expansion, incorrect sheet orientation, or a template that does not match the label product number. Start with a plain-paper alignment test at 100% scale.
Do candle labels need to be waterproof?
Not every candle label must be waterproof, but resistance to moisture, oil, and handling can improve the customer experience. Test the material under the conditions in which your candles will be stored, shipped, and used.
How do you print labels for candles at home?
Start with a label material made for your printer, design the artwork at the final label size, print a plain-paper alignment test, then choose the closest matching media and quality settings in the printer driver. Print one label sheet first, let the ink dry fully, and test the finished label on the actual candle jar before printing a larger batch.
Final Checklist
- Use label stock made for your printer type.
- Design at the final physical size.
- Select the correct paper size.
- Print at 100% or Actual Size.
- Choose the closest media type and High or Best quality.
- Run a plain-paper alignment test first.
- Clean the jar and apply the label at room temperature.
- Test a small batch before printing your full order.
Once you find a reliable paper-and-settings combination, home printing becomes a flexible way to test scents, create seasonal collections, and produce short runs without committing to a high minimum order.