

Want to make professional stickers in Adobe Illustrator without guessing your way through cut lines, white borders, bleed, and export settings? This beginner-friendly tutorial walks you through the complete workflow—from opening a new document to creating a print-ready sticker sheet.
We’ll build a simple round candle sticker as the example, but the same process works for logo stickers, product seals, thank-you stickers, packaging labels, bakery stickers, soap labels, and many other small-business packaging projects.
Quick answer: To make stickers in Adobe Illustrator, create your artwork at the correct size, keep important text and graphics inside the safe area, use Object > Path > Offset Path when you need an outer contour, create a clean white border if desired, organize the artwork and cut line on separate layers, then export a PDF for printing or PNG/SVG for other workflows.
If you are new to Illustrator and want a broader overview first, read our Adobe Illustrator for Packaging Design guide.
What You Need Before You Start
- Adobe Illustrator
- Your logo, illustration, or sticker artwork
- Printable sticker paper that matches your printer technology
- A home printer or professional print service
- Optional: a cutting machine such as Cricut or Silhouette
If you are still choosing materials, compare our best printable sticker paper for small business. If you need a printer, see our best printers for stickers.
Step 1: Create a New Sticker Document

Open Illustrator and create a new document. For a printable sticker sheet, A4 or US Letter is a practical starting size. If you are preparing a file for a professional printer, use the exact page size and bleed they request.
Suggested starting setup:
- Units: millimeters or inches
- Artboard: A4 (210 × 297 mm) or US Letter (8.5 × 11 in)
- Color mode: CMYK for many commercial print workflows; follow your printer’s requirements
- Bleed: use the printer’s specified value; 3 mm is common in many print workflows
- Raster Effects: 300 ppi when your design uses raster effects that need high-resolution print output
Important: do not treat CMYK or 3 mm bleed as universal rules. Some home printers, cutting-machine workflows, and online print providers may request RGB files, no document bleed, or a different bleed value.
Step 2: Build the Sticker Artwork

Now create the actual sticker. For our example, we are designing a round candle label with a brand name, candle illustration, botanical elements, and scent name.
- Choose the Ellipse Tool (L).
- Hold Shift while dragging to create a perfect circle.
- Add your logo, icon, illustration, or product graphic.
- Use the Type Tool (T) to add the brand name and other text.
- Keep decorative elements on separate layers or groups so they are easy to edit.
For a product sticker, prioritize legibility over decoration. The customer should be able to read the brand, product name, scent or flavor, and any important information at the sticker’s actual printed size.
Step 3: Align the Text and Design Elements

Select the objects and use Illustrator’s Align, Transform, guides, and Smart Guides to create a balanced composition.
For a circular sticker, check that the main icon is optically centered—not just mathematically centered. Decorative leaves, flowers, or illustrations can make one side appear heavier even when the bounding box is perfectly aligned.
Tip: zoom out to 100% and also view the sticker at approximately its final physical size. Tiny text and thin strokes that look good at 300% zoom may disappear or become difficult to read when printed.
Step 4: Create the Sticker Outline with Offset Path

For a die-cut style sticker, Illustrator’s Offset Path command is one of the most useful tools. Select the shape that defines the outside of the sticker, then go to:
Object > Path > Offset Path
Enter a positive offset value to create a larger path outside the original shape. Adobe’s current Illustrator documentation confirms that Offset Path creates a duplicate path at a specified distance inward or outward.
For a simple sticker, an offset of roughly 2–3 mm can create a visible border, but the correct value depends on the sticker size and visual style. Preview the result before clicking OK.
Step 5: Add a White Sticker Border
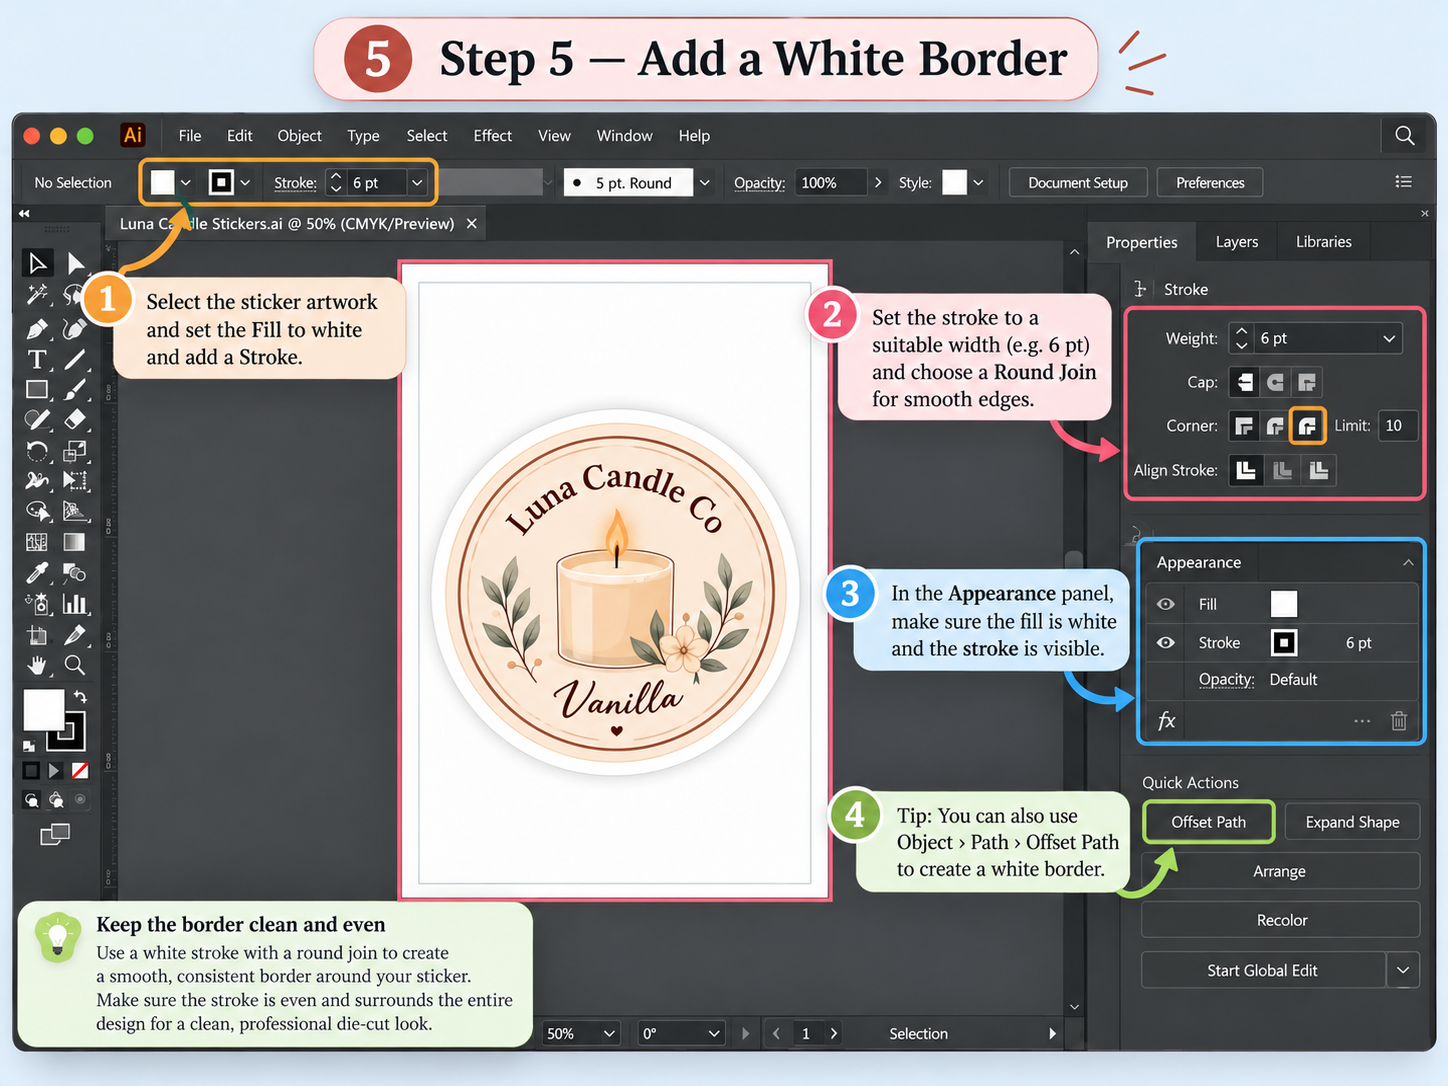
A white border creates the classic die-cut sticker look and gives detailed artwork breathing room around the edges.
One clean workflow is to use the offset shape you created in Step 4:
- Place the offset shape behind the original artwork.
- Set its fill to white.
- Remove unnecessary strokes unless your cutting workflow needs one.
- Check that the border looks even around the entire design.
For irregular artwork, the border should follow the overall silhouette without creating tiny gaps or sharp protrusions that may be difficult to cut cleanly.
Step 6: Create the Cut Line and Check Bleed
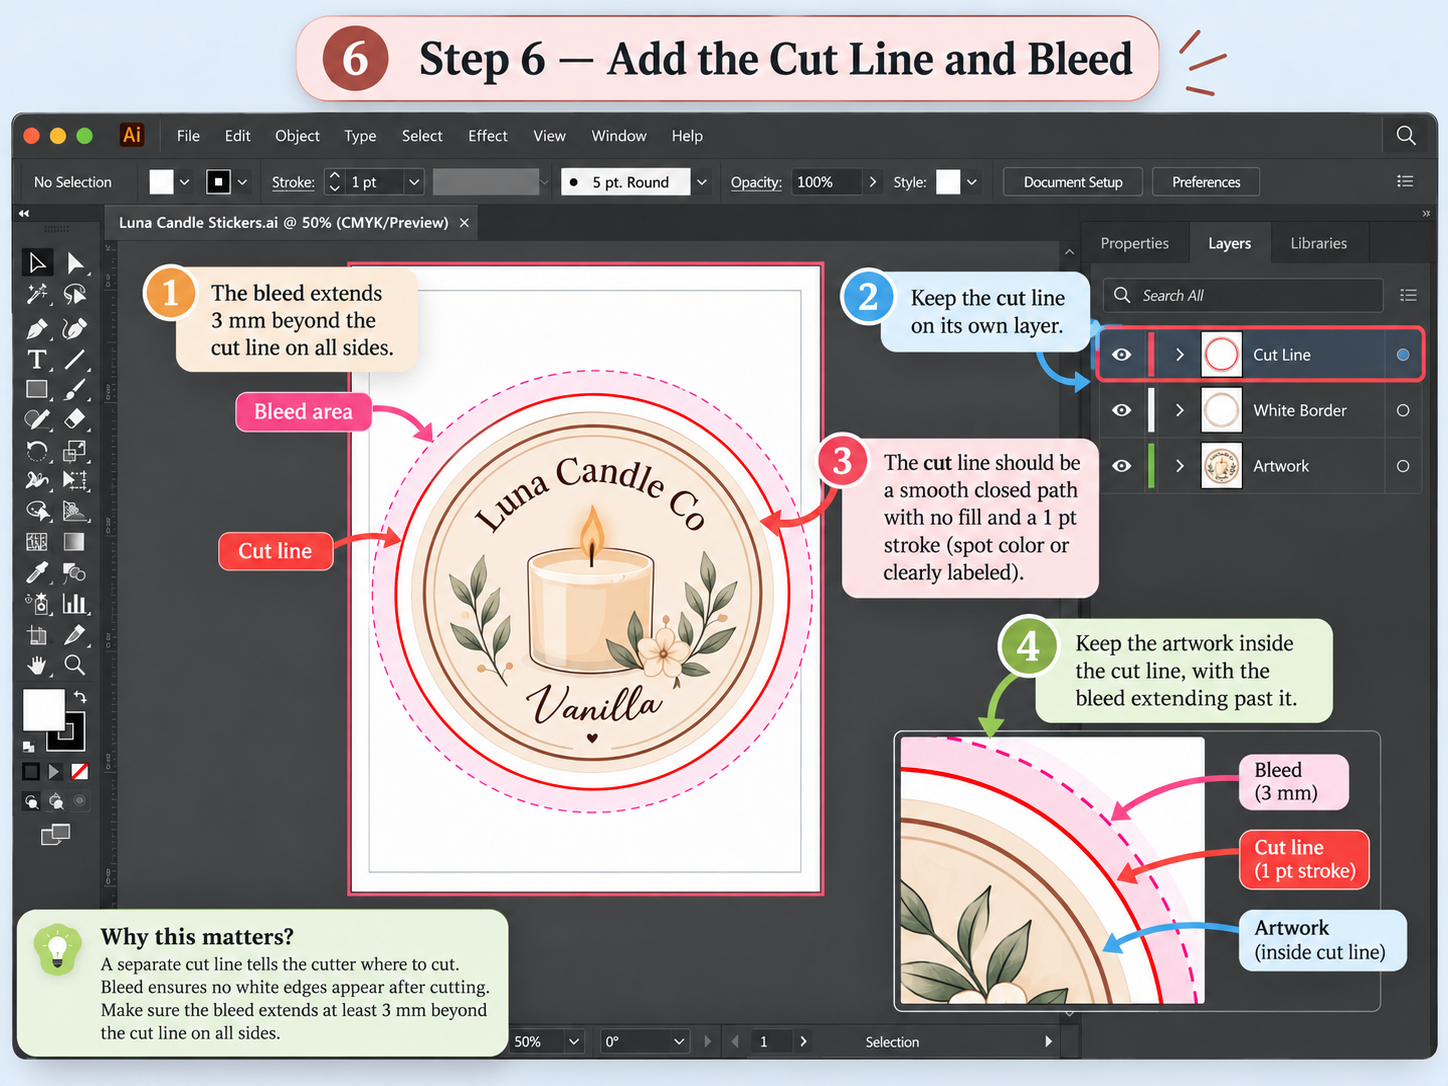
If a professional printer or cutting workflow requires a separate cut contour, duplicate the final outer path and keep it on its own clearly named layer, such as Cut Line.
A simple layer structure might be:
- Cut Line
- White Border
- Artwork
- Background / Bleed
Important: the exact cut-line color, stroke weight, spot-color name, overprint setting, and bleed requirements depend on the print shop or cutting system. Do not invent these production settings. Ask the provider for its template or file-preparation instructions.
For artwork that prints to the edge of a sticker or sheet, extend the background beyond the trim/cut boundary by the amount requested by the printer. Adobe describes bleed as artwork extending outside the trim area so small cutting variations do not leave an unwanted unprinted edge.
Step 7: Arrange Multiple Stickers on the Sheet
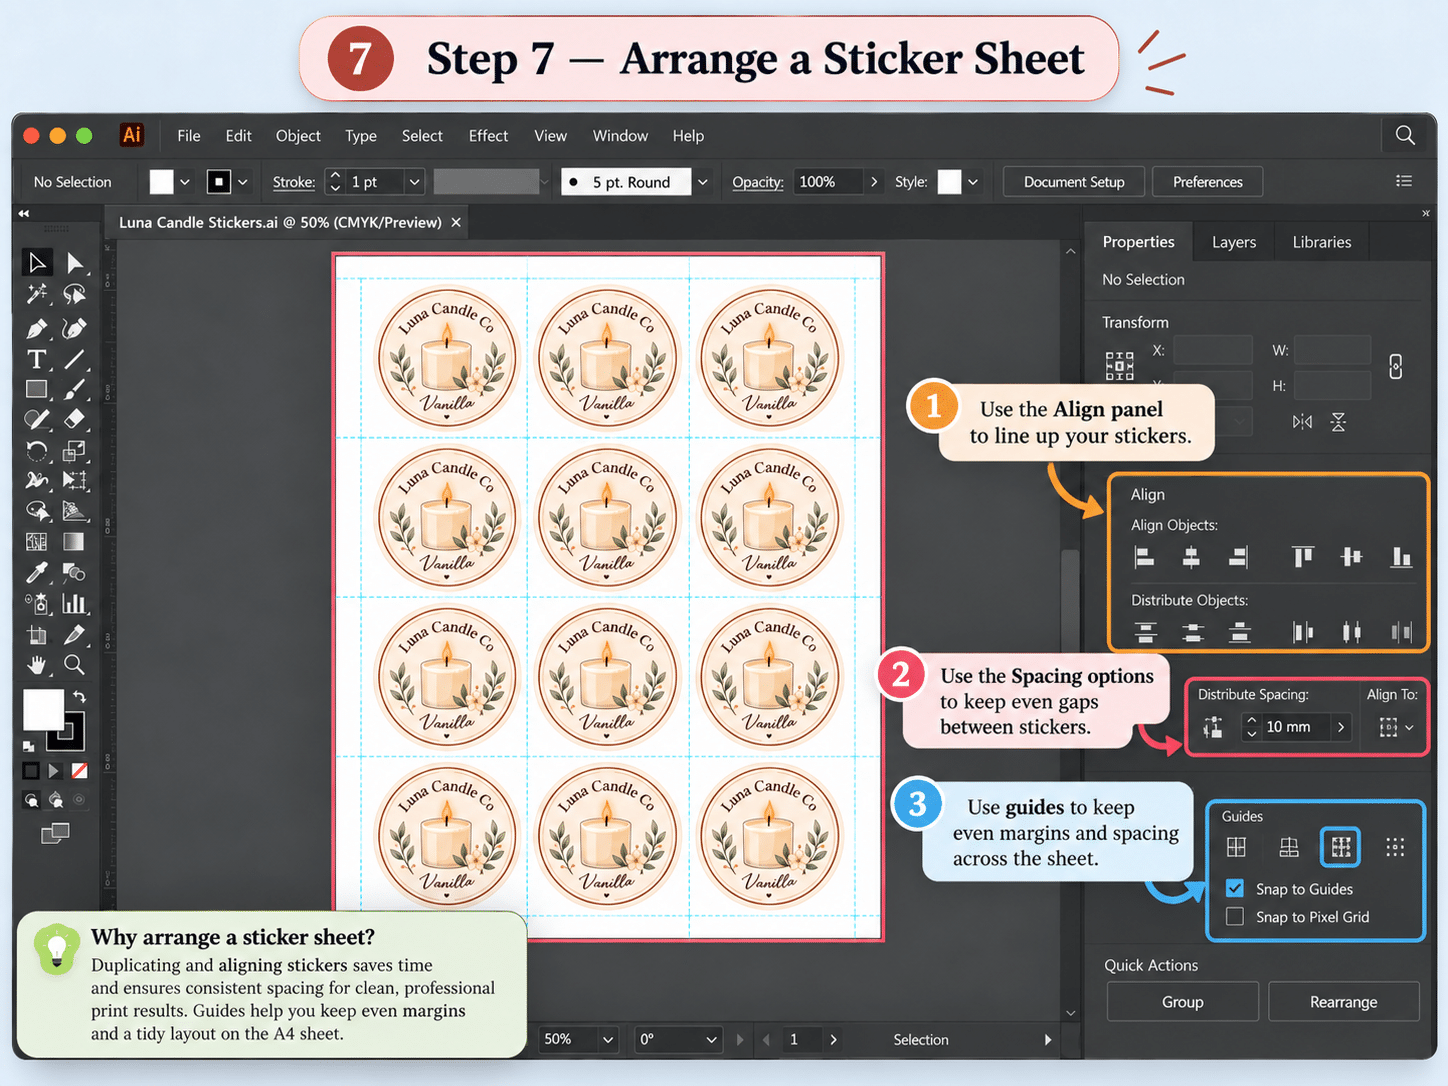
Once one sticker is finished, group the artwork and duplicate it across the page.
Use the Align and Distribute Spacing controls to create consistent rows and columns. Leave enough space between stickers for cutting and avoid placing artwork inside the printer’s non-printable edge area.
Before filling an entire sheet, confirm the sticker’s real dimensions in the Transform panel. A 50 mm sticker should remain 50 mm after duplication—do not resize individual copies accidentally.
Step 8: Save a Print-Ready PDF

For professional printing, PDF is often the most useful delivery format because it can preserve vector artwork, text, color information, and bleed settings.
Go to File > Save As and choose Adobe PDF. In the PDF options, review the printer’s requested preset and open Marks and Bleeds if needed.
Illustrator’s PDF options include a Marks and Bleeds section where you can add trim marks and use the document’s bleed settings. Only enable marks requested by the printer—more marks are not automatically better.
Step 9: Export PNG, SVG, or PDF for Different Uses
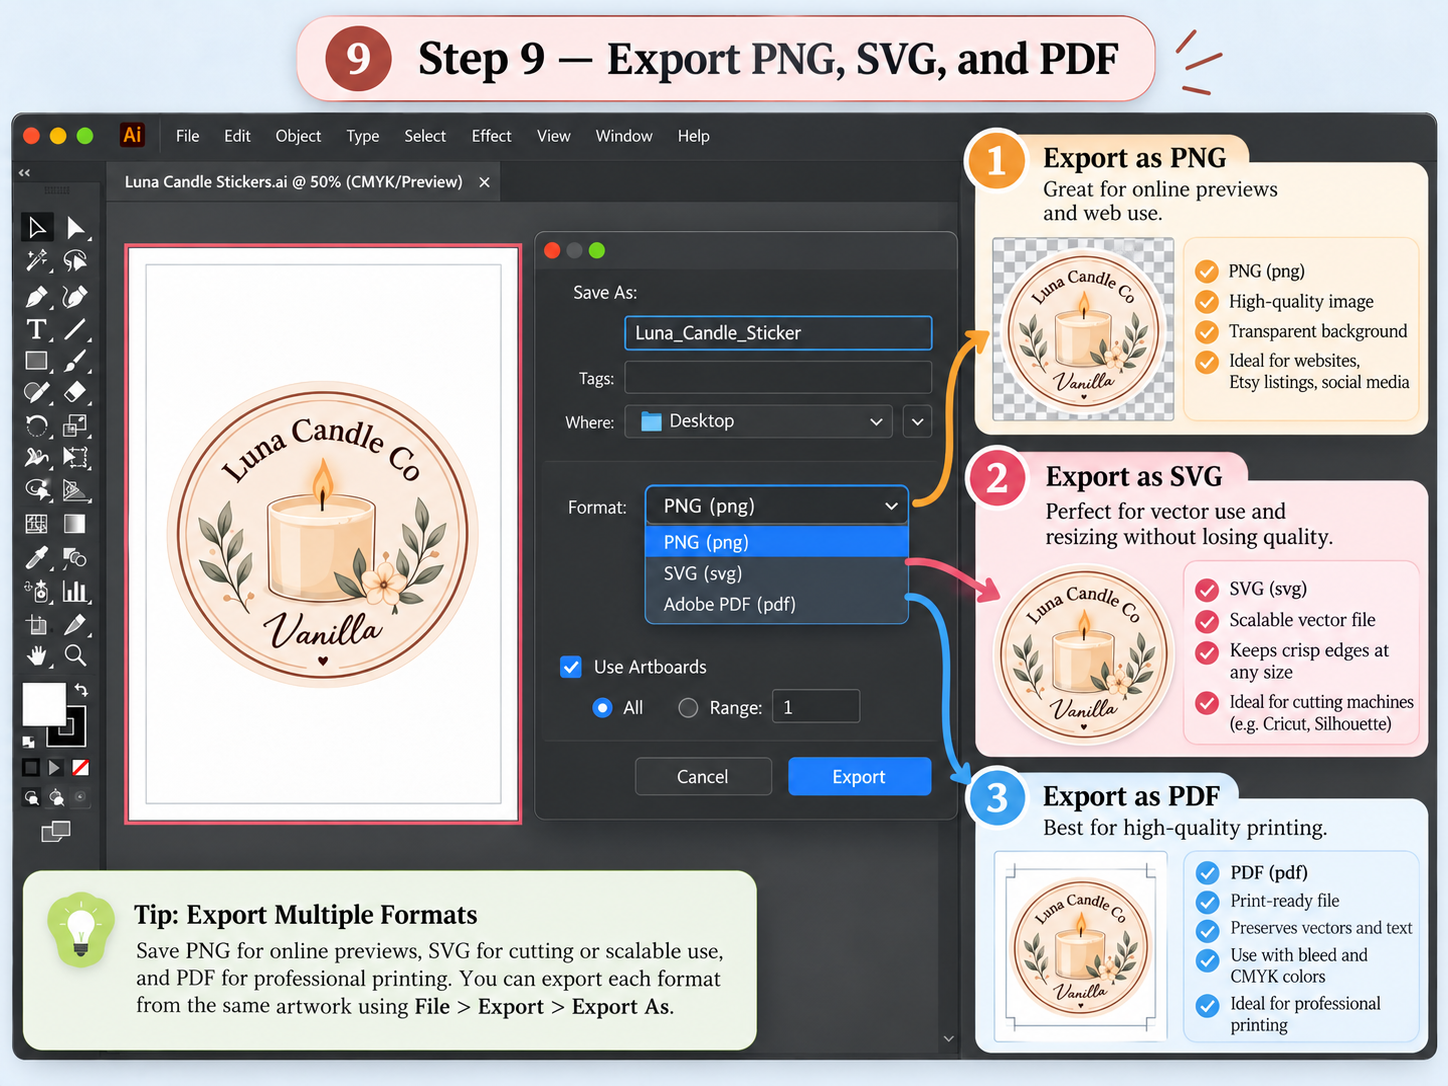
You may need different versions of the sticker file depending on what happens next.
| Format | Best use | Watch for |
|---|---|---|
| PNG | Online previews, product listings, social media | Raster file; export at adequate resolution |
| SVG | Scalable vector artwork and some cutting-machine workflows | Check fonts, strokes, and compatibility with the target app |
| Professional printing and print-ready artwork | Follow the printer’s color, bleed, and mark requirements | |
| AI | Editable Illustrator master file | Keep this as your working source file |
Keep the original AI file even after exporting. It is the easiest version to update when a product name, scent, price, or ingredient statement changes.
Step 10: Test Print and Cut the Stickers
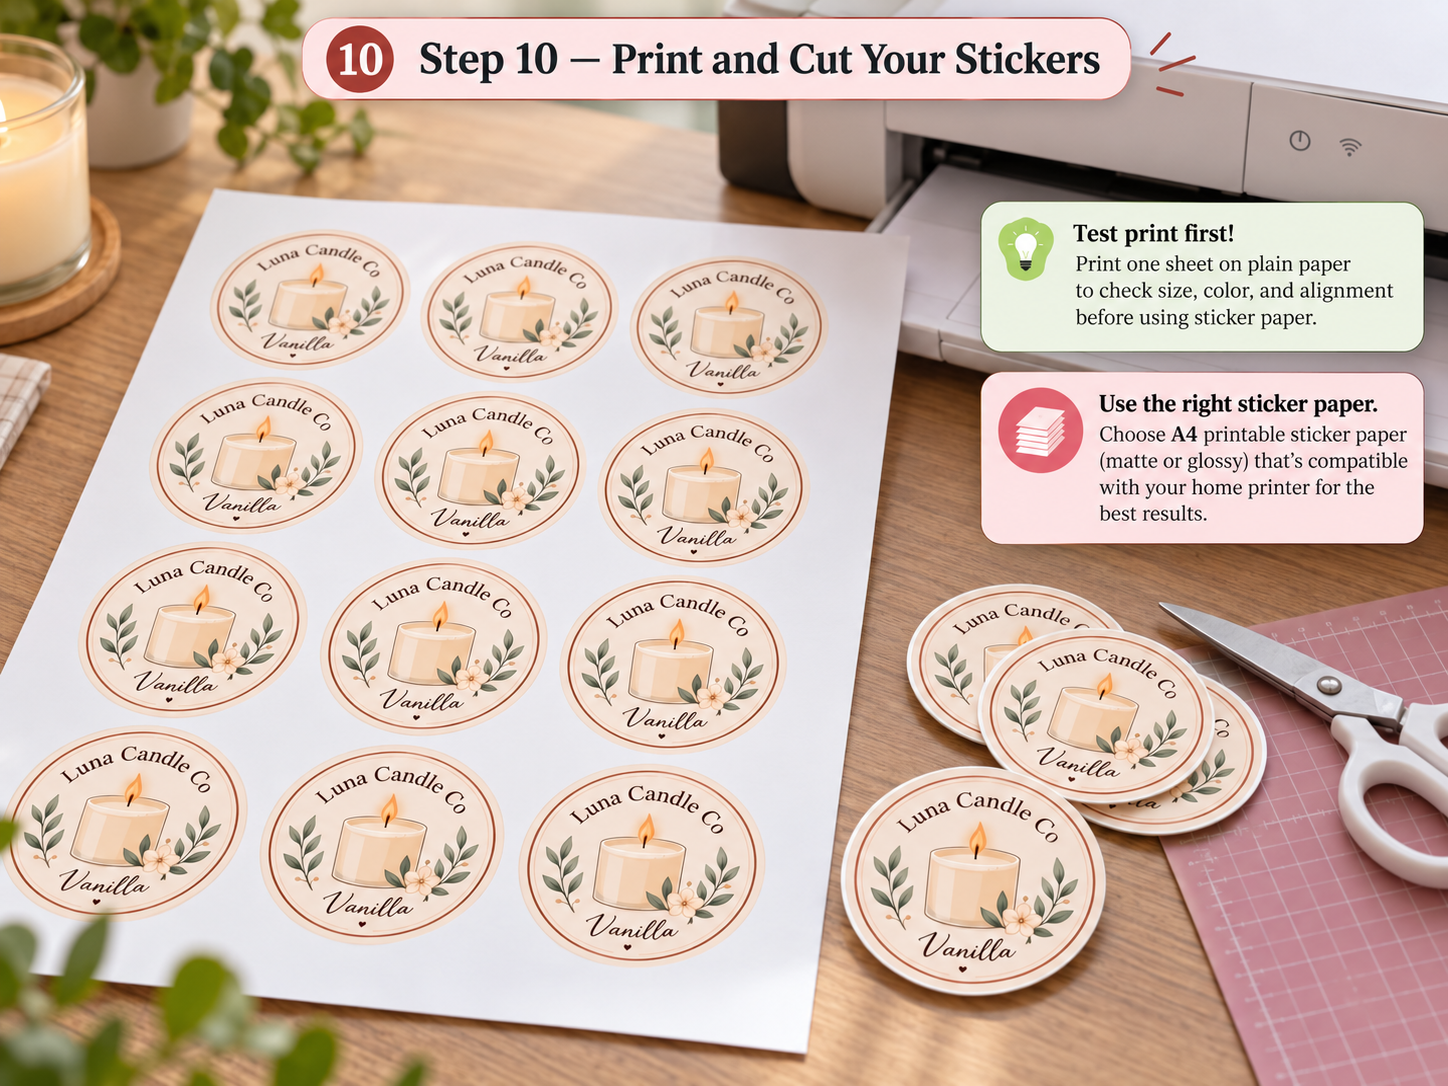
Before using expensive sticker paper, print one test page on plain paper.
Check:
- Final sticker size
- Text readability
- Color and contrast
- Margins
- Alignment
- Cut-line placement
- Spacing between stickers
Then print a single sheet on your chosen sticker material. Printer settings vary by paper, so follow the sticker-paper manufacturer’s recommendations for media type and print quality.
If you are printing product labels at home, our step-by-step product label printing guide covers scaling and home-printing checks in more detail.
Common Sticker Design Mistakes in Illustrator
Making text too small
Always test the design at its real printed size. Fine serif fonts, scripts, and thin strokes can become difficult to read.
Using the wrong sticker paper
Inkjet, laser, thermal, and specialty roll media are not interchangeable. Use stock specifically designed for your printer.
Using a cut line without checking the printer’s requirements
Print providers often have their own naming, spot-color, stroke, and bleed standards. A generic magenta line is only a visual example—not a universal production specification.
Forgetting to test the physical package
A sticker can look perfect on-screen and still feel too large, too small, or difficult to read on the actual jar, pouch, bottle, or box. Print a prototype and apply it to the real product.
Adobe Illustrator Sticker Design FAQ
How do I make a sticker outline in Adobe Illustrator?
Select the outer shape or silhouette and use Object > Path > Offset Path. Enter a positive offset to create a larger path around the design, then use that path as a border or as the basis for a cut contour, depending on your production workflow.
How much white border should a sticker have?
There is no universal size. Around 2–3 mm can look balanced on many medium-size stickers, but small stickers may need less and large stickers may need more. Judge it visually at actual print size.
Should sticker files be RGB or CMYK?
Follow the printer’s specification. Many commercial print workflows use CMYK, while some home printers and online print services accept or prefer RGB files and handle conversion internally.
Do stickers need bleed?
If the printed artwork reaches the final cut edge, bleed is generally useful because it protects against small cutting shifts. The exact amount should come from the printer or cutting workflow.
Is Illustrator good for making stickers?
Yes. Illustrator is especially useful for stickers because vector artwork can be resized without losing quality, paths can be edited precisely, and cut contours, layers, typography, and print-ready PDFs can be prepared in one file.
Can I make stickers in Illustrator and cut them with Cricut?
Yes, but the final Cricut workflow depends on Design Space and the type of project. SVG or PNG files are commonly used for importing artwork. Always check the current cutting-machine software requirements before exporting.
Final Checklist Before Printing
- Sticker dimensions are correct
- Text is readable at actual size
- Artwork is inside the safe area
- White border is clean and even
- Cut line is on the correct layer if required
- Bleed follows the printer’s specifications
- Sticker paper matches the printer
- One plain-paper test has been printed
- One final-material test has been checked on the real product
Final Thoughts
Adobe Illustrator gives small businesses much more control over sticker size, typography, vector artwork, borders, cut paths, and print preparation than a simple drag-and-drop editor. Once you understand the basic workflow—artwork, offset path, border, cut line, sheet layout, and export—you can reuse the same process for dozens of packaging projects.
Next, choose the right material in our printable sticker paper guide, or compare the best printers for stickers if you are building an in-house sticker workflow.